How to Choose Your Favorite Headshots and Leave Notes in Your Gallery
Now that your headshot session is complete, you’ll receive an online gallery where you can choose your favorite image and, if you’d like, leave notes about how you want it retouched.
This guide shows you exactly how to:
- Mark photos as Favorites
- View your Favorites list
- Add notes to specific images
Step 1: Open Your Online Gallery
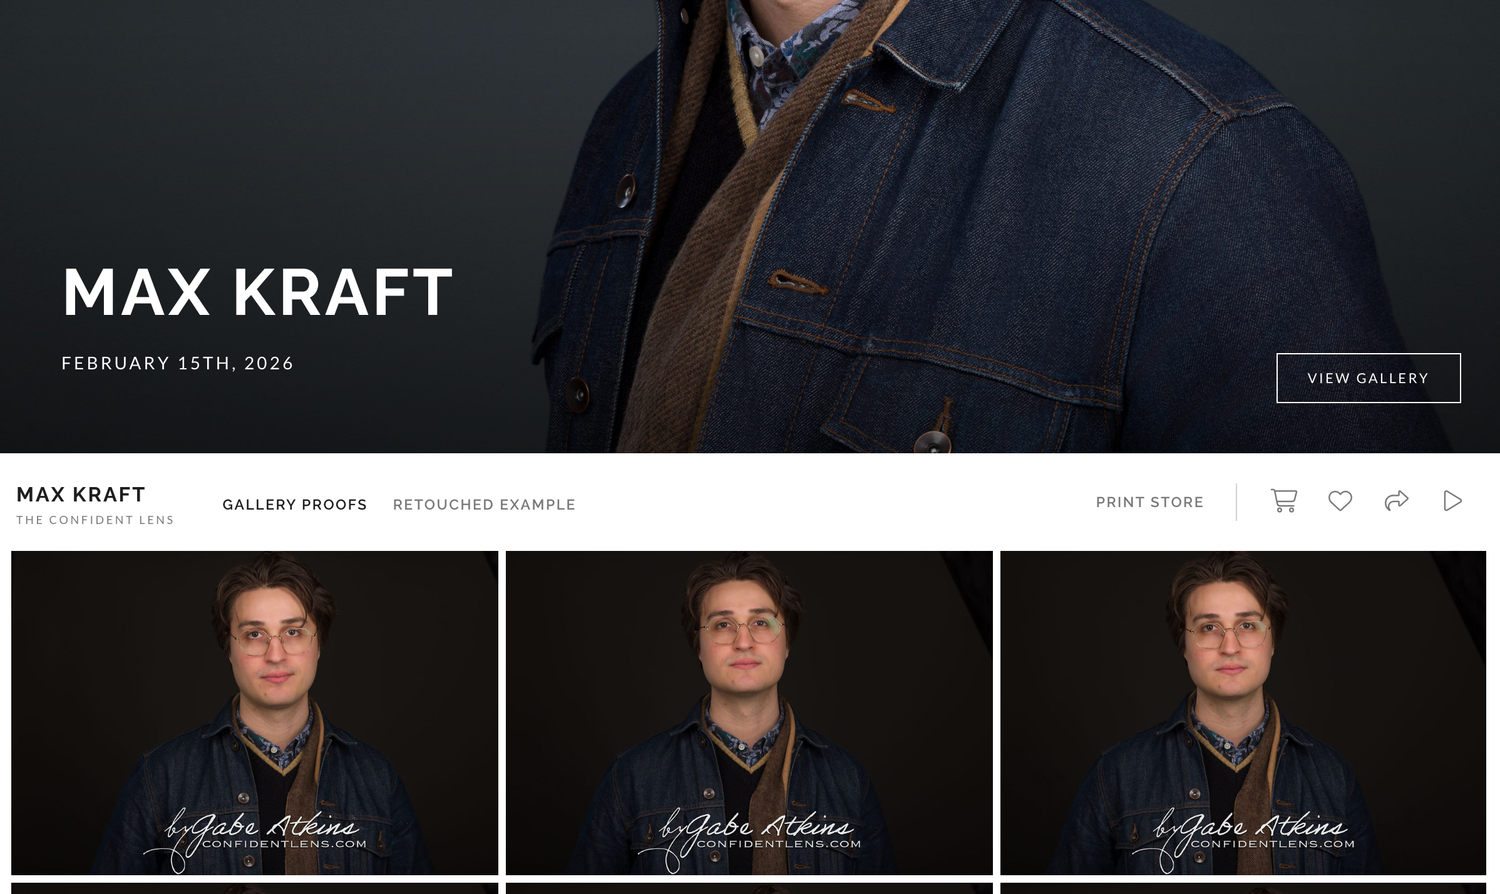
You should have received an email notifying you that your gallery is ready for viewing and selecting your photos. The link to your gallery is included in that email. Click the link and your gallery will open in your browser on your computer, tablet, or phone. My recommendation is to view your gallery on your Desktop (bigger screen) or a tablet such as iPad. This ensures you can view the photos at higher resolution and larger than you would in a traditional phone screen.
Step 2: Mark Photos as Favorites
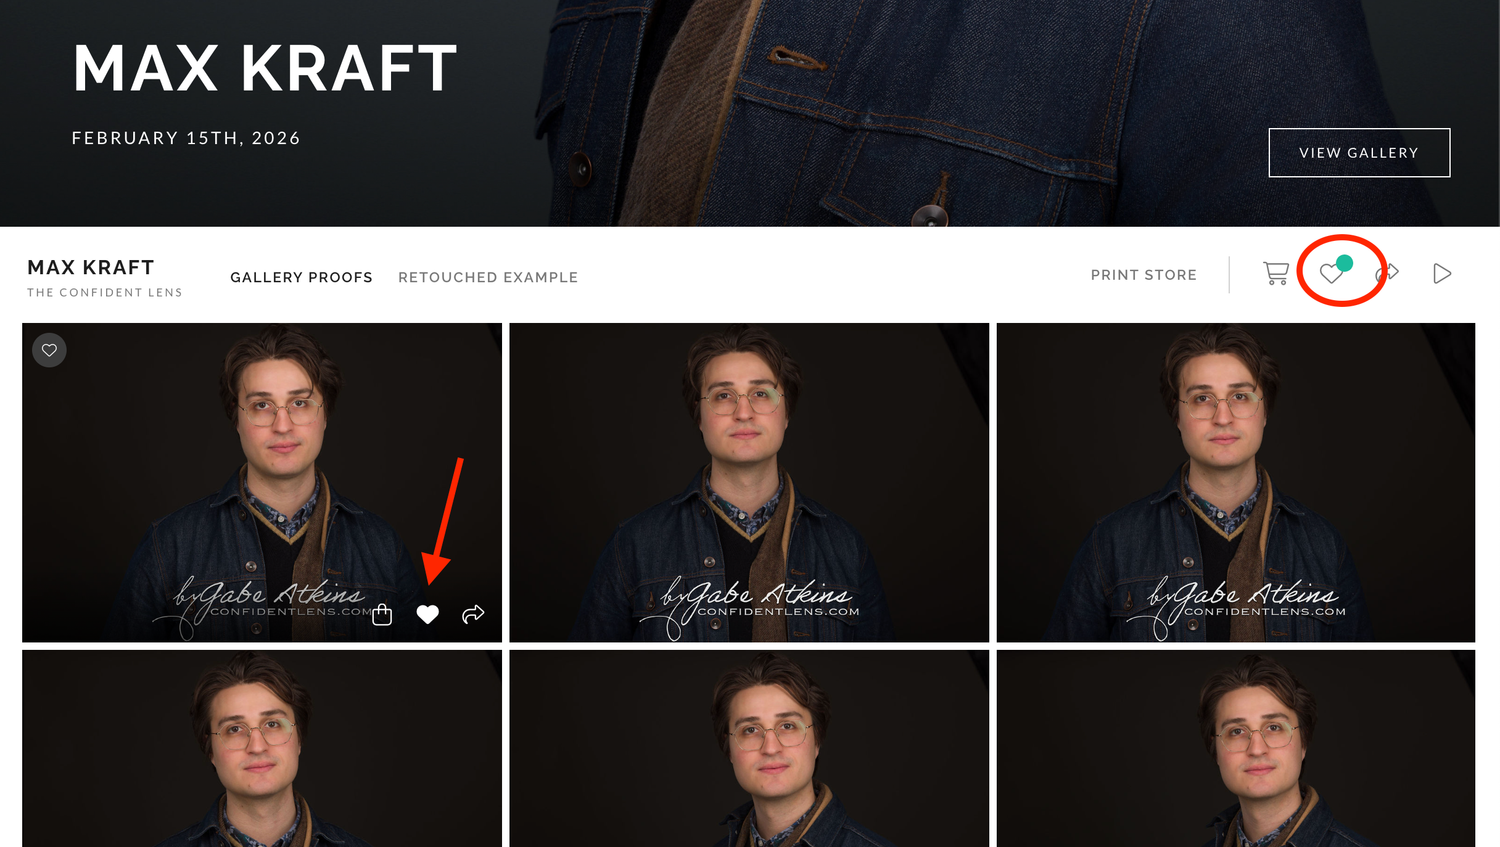
As you scroll through your gallery, look for the small heart icon on each image thumbnail.
To favorite a photo:
- Hover over (or tap) the image.
- Click or tap the heart icon (♡) on the photo.
- The heart will turn solid, showing that the image has been added to your Favorites list. Note that the Heart Icon on the navigation bar also has a green bubble on it indicating that your Favorites list now has photos inside it.
The first time you click the heart, you may be asked to enter your email so the gallery can save your Favorites under your address.
Step 3: View Your Favorites List
When you’re done going through the gallery, you can review just your chosen images in one place.
To open your Favorites:
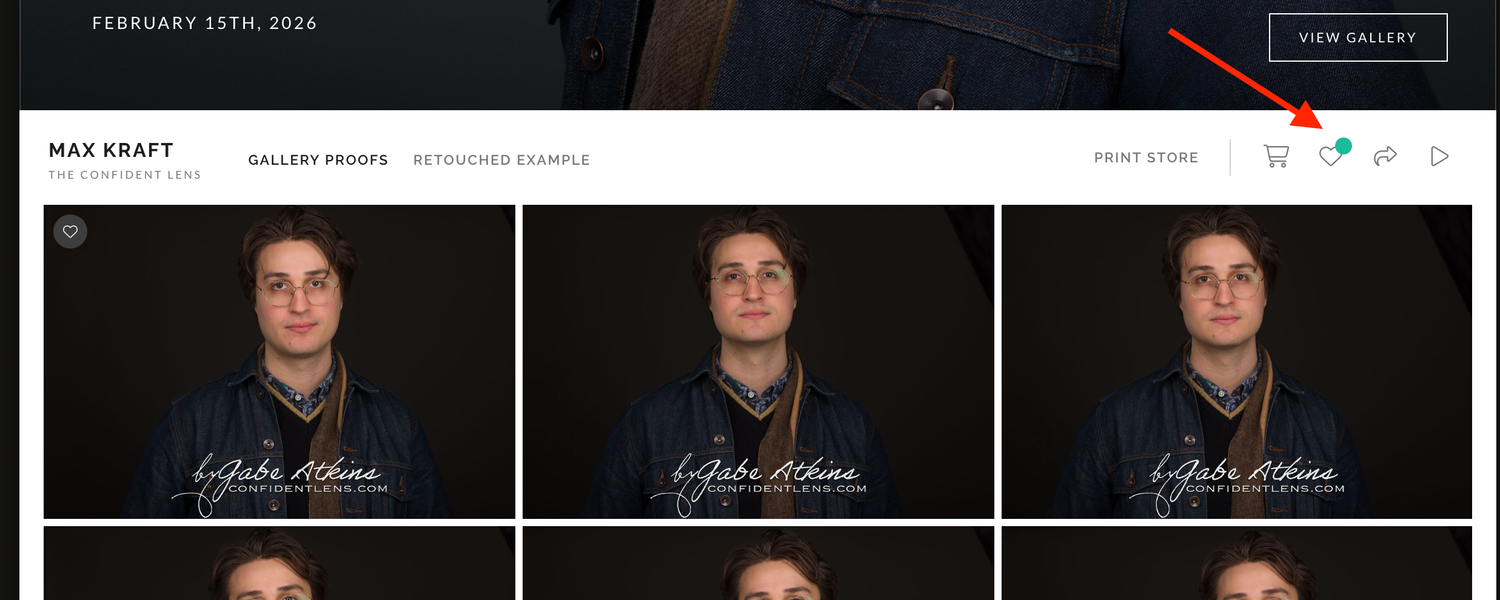
- Click or tap the heart icon at the top right of the gallery page.
- If prompted, enter the same email address you used when you started favoriting.
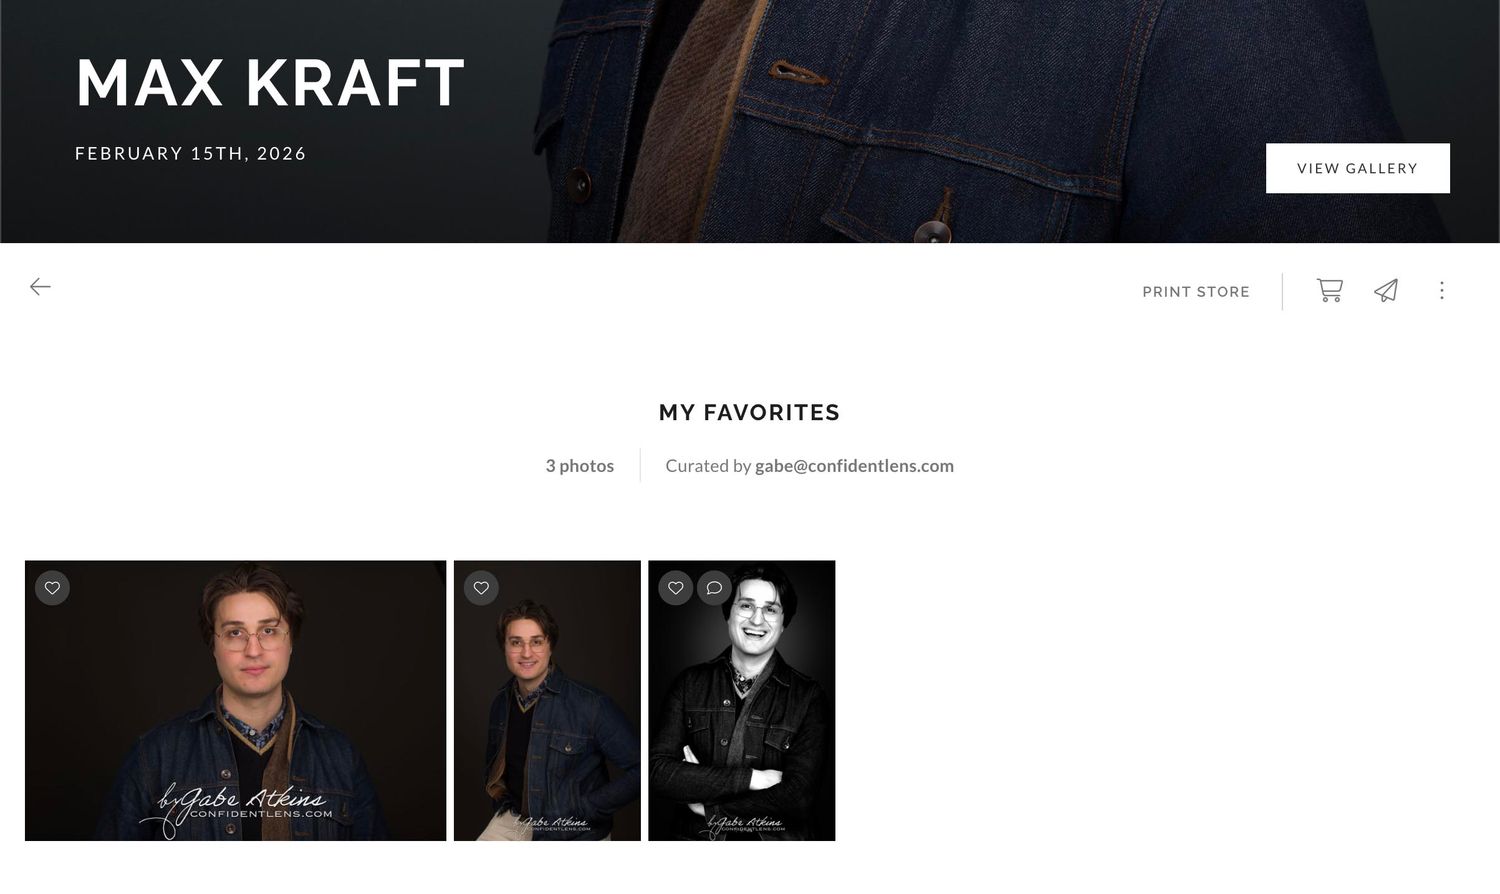
- You’ll see a view that shows only the images you’ve marked as Favorites.
From this view, you can:
- Double-check your selections
- Remove any images by clicking the heart again
- Make sure you’ve selected the number of photos included with your session
Step 4: Add Notes on Specific Images
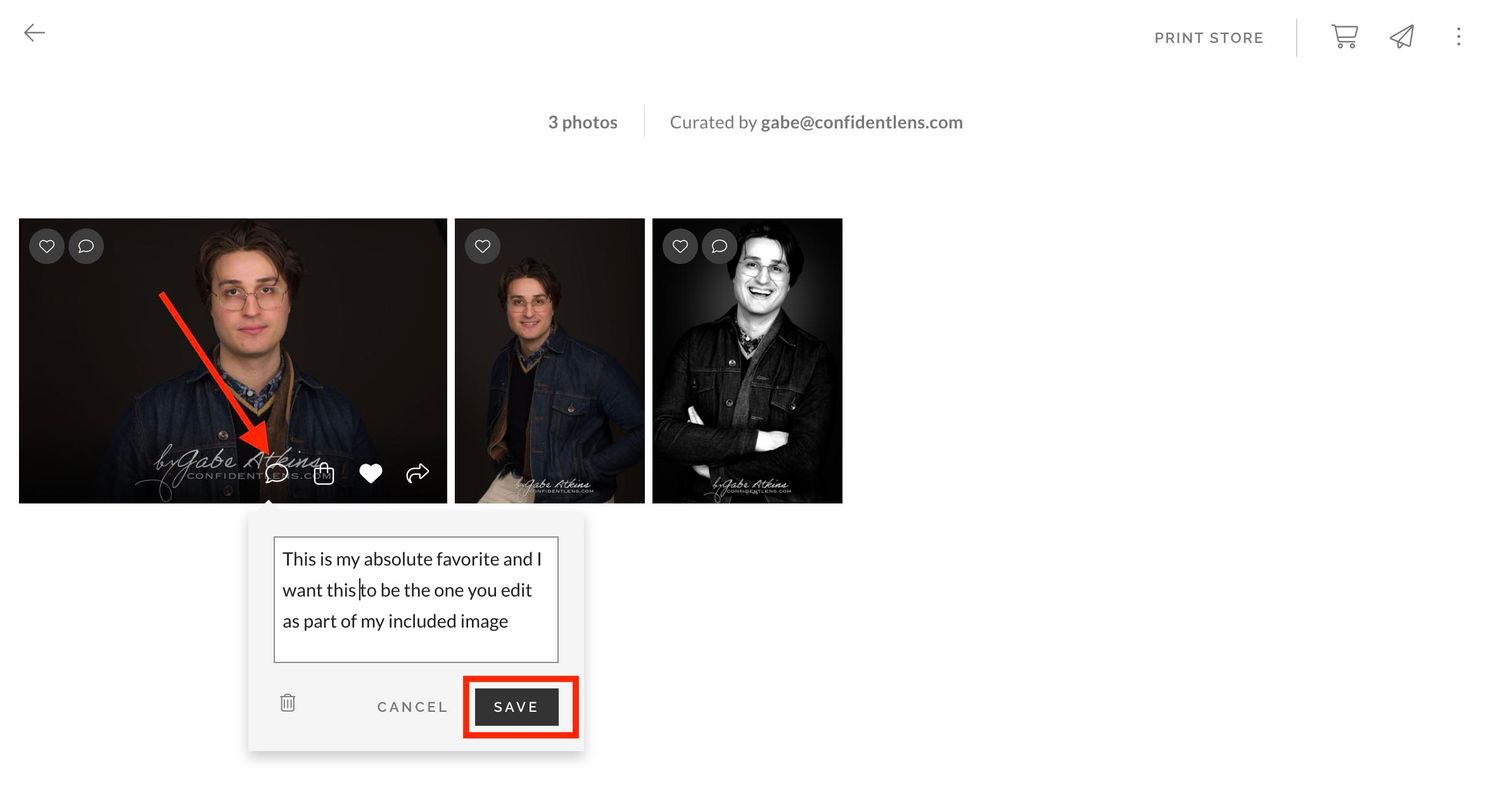
If you’d like to request particular edits on a photo—like softening skin, reducing shine, or choosing between color and black-and-white—you can leave a note directly on that image. Additionally, if your session included retouched photos as part of the package, this is where you'd type which of your favorites you want to have fully retouched and made available for download free of charge.
To add a note:
- Make sure the image is in your Favorites list.
- Open your Favorites view by clicking the heart at the top of the gallery.
- Hover over (or tap and hold on mobile) the image you want to comment on.
- Click Add Note when you see the option appear.
- Type your note (for example: “This is my absolute favorite and I want this to be the one you edit as part of my included image” or “Can you soften the shine on my forehead?”).
- Click Save.
Your notes are attached to that specific photo, so I can see exactly what you’re asking for when I retouch your image.
Step 5: Let Me Know You’re Done
Once you’ve:
- Selected your Favorites
- Added any notes or retouching requests
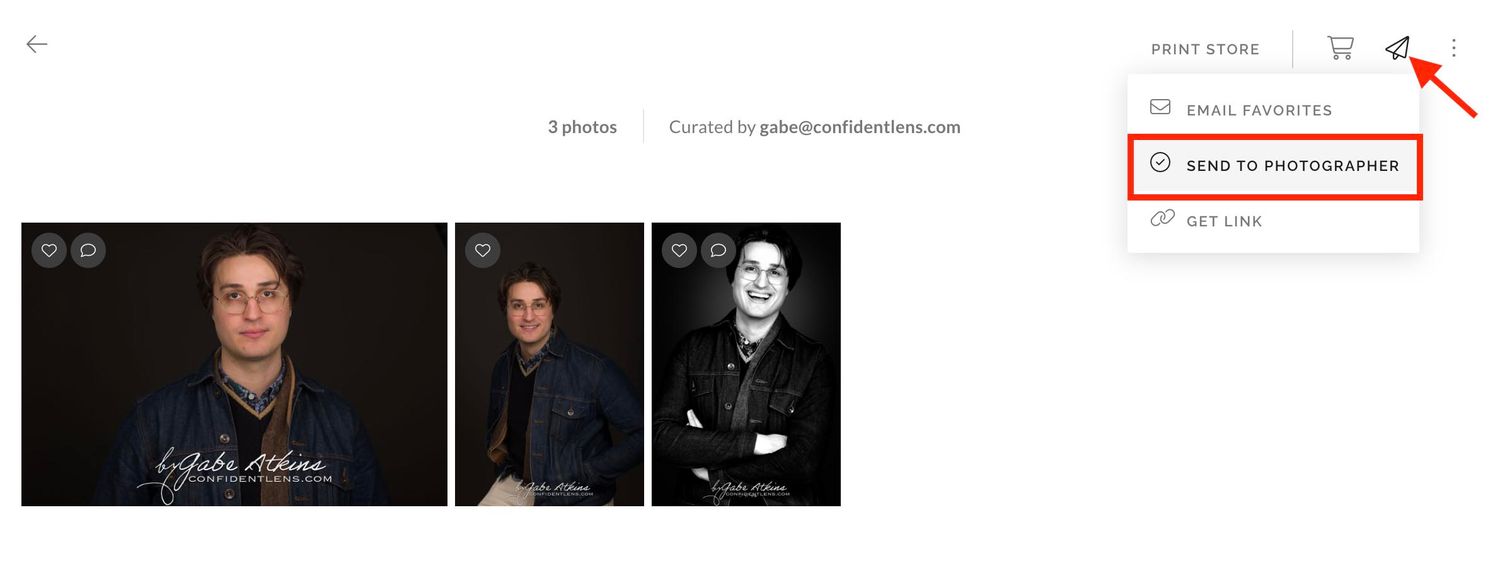
- Using the “Send to Photographer” option in your gallery, share that you are done with your list. Alternatively, you can just reply to your gallery ready email.
I’ll then:
- Confirm which image(s) are included with your session
- Apply professional retouching based on your notes
- Deliver your final, high-resolution files in a section called "Retouched Photos" which will be added after your photos have been professionally retouched.